Setting up a Workflow:
The page where you design the workflow is referred to as the Workflow settings. On this page, you can make changes to the workflow’s configuration. The primary purpose of these workflows is to facilitate task assignment.
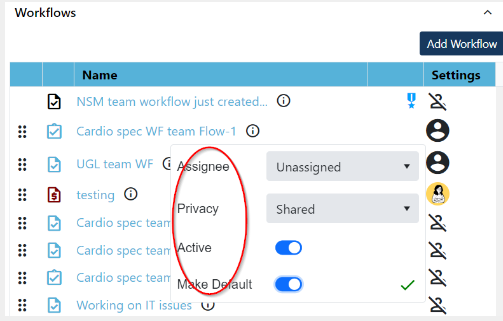
Quick settings: it is referred as the Workflow panel in the team settings sidebar allows users to manage certain minor settings of a workflow. These settings include changing the workflow assignee, adjusting privacy settings, marking the workflow as inactive, and setting it as the default workflow:
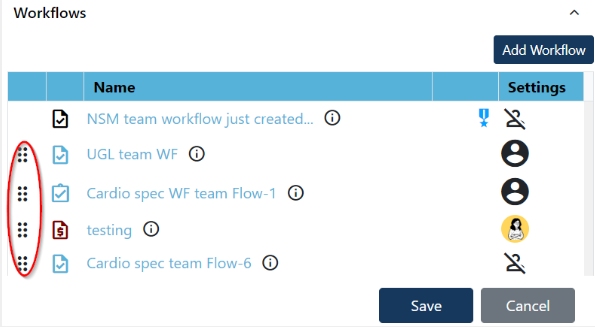
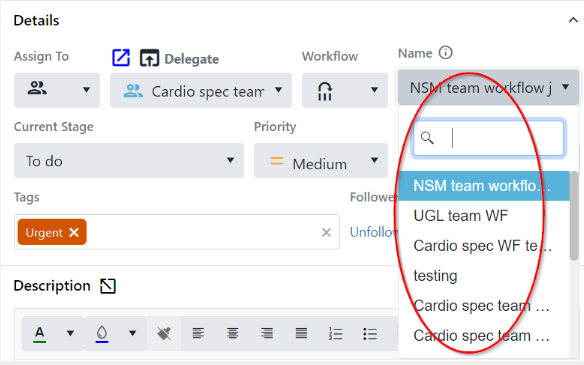
You have the option to modify the sequence of Workflows in the Workflow panel of the team settings sidebar, and this exact ordering will be reflected in the Task assignment drop-down menu within the Task sidebar, as shown below in the images:
Sorting can be modified from here:
The sorting of Workflows created will be visible here during the task assignment:
Workflow name: you have the flexibility to update the default name and information of a workflow on the settings page. The assigned workflow names are displayed at the top of the settings page, allowing you to easily identify the workflows during the task assignment. The Workflow name field allows you to input a maximum of 35 characters.

Quick info: The Workflow information field has a character limit of 120, allowing users to provide a concise description of the task’s intended Workflow. This input helps users understand which Workflow the task should be directed to. Simply input the relevant information in the designated field, as shown in the image below:

A tooltip in the “I” icon will display the workflow information by hovering over it during task assignment and the same tooltip will also be seen in the Workflow panel of the Team settings sidebar, as shown in the below image:
I icon tool tip in the task sidebar:
![]()
I icon tool tip in the Workflow panel of the team settings sidebar:

Workflow Icons (task type), privacy settings, Workflow inactive toggle, Task comments can be found on the right side of the Workflow name and information.
![]()
Workflows Icon and Privacy: by default, an icon is allocated to every workflow. You have the option to choose the icon that best suits your specific workflow needs. The icon chosen for each workflow on the settings page will be linked to the task created through that workflow. You can update the icon for a workflow at any time, which will result in new tasks being generated with the updated icon for that workflow. Workflow icons can be set up from here:
![]()
Icons representing workflows will be visible in the Team grid, at the top of the task sidebar, and in the Workflow panel within the Team settings sidebar. The color of these icons will correspond to the privacy settings chosen for each workflow.
Image for task icons in the Team grid:
![]()
Image for task icons in the task sidebar:
![]()
Image for task icons in the Workflow panel within the team settings:
![]()
By default the Workflow privacy settings have been made closed. Members of the Team and the workspace have access to closed workflows. Therefore, when assigning tasks to an external flow element, members of the same Workspace and Team can choose any shared or a closed workflow. You can adjust the privacy type of the Workflow from the settings page, as shown below in the image:

Settings of the Task:
Task name: you have the option to select a task name for the Workflow, which will be visible to all users who choose to send the task to your Workflow during the task assignment. If you leave the task name field blank in the Workflow settings page, the user sending the task to that Workflow will be able to enter their own task name. However, if you provide a task name for your Workflow, it will override the task name entered by the user, if any, when assigning the task.

Task setup: during task setup, you have the opportunity to customize task priority, work effort, and the number of days for a task to be archived after completion. These fields are accessible in the basic elements configuration on the settings page, allowing you to select values that align with your preferences.
Tags: from the Workflow settings page, you have the flexibility to add an unlimited number of tags, which will be automatically included in the task during its creation process. Additionally, you can also add extra tags directly from the task sidebar.
Followers: you can add an unlimited number of followers from the Workflow settings page, these followers will be seen during the task creation process.

Reminders: Coming Soon !!
This feature will give you the liberty to get reminder notification when you’re near it. You can set up reminders from the same place, reminders set up from the Workflow setting page, will be considered as dynamic reminders. With dynamic reminders, if you change the due date of a task to be 10 days ahead, the reminders for the task will be automatically adjusted accordingly. However, if the due date is changed to an earlier date that does not trigger a reminder, the reminder will not be activated.
Stages: both the team owners and collaborators have the ability to access the Stage panel through the Workflow settings page that will take you to the Team settings sidebar. However, it is important to note that Team collaborators do not have the authorization to delete stages that have been added by the Team owners.
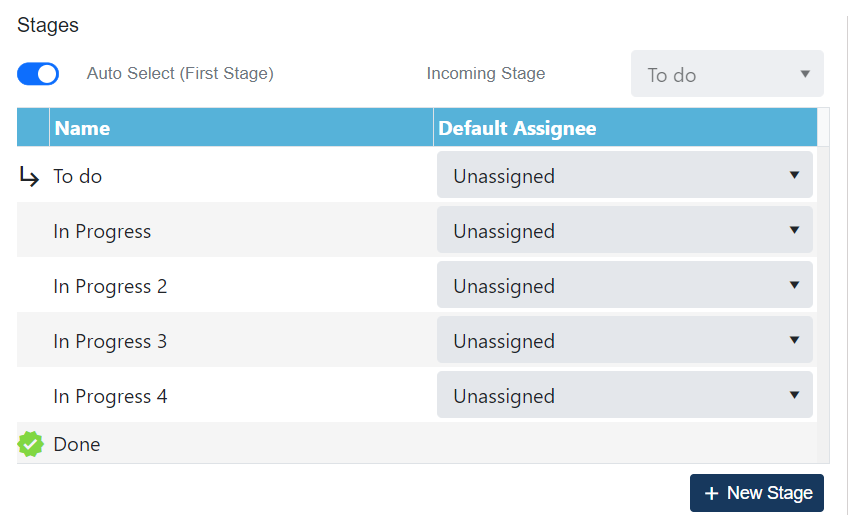
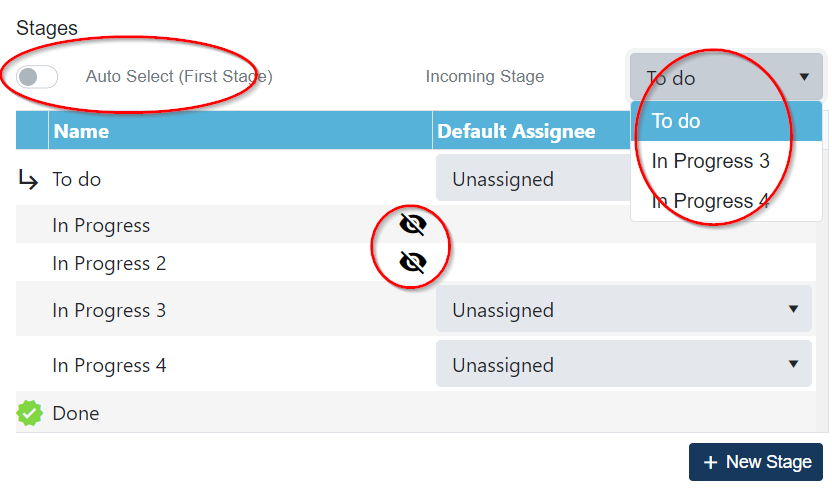
On the Workflow settings page, you have the option to deactivate the auto select toggle, which enables you to choose the incoming stage from a dropdown menu of available options. The incoming stage provides the ability to specify to which stage you can receive tasks from others. The panel enables you to choose the incoming stage, incorporate a new stage and modify the default assignee for each stage:
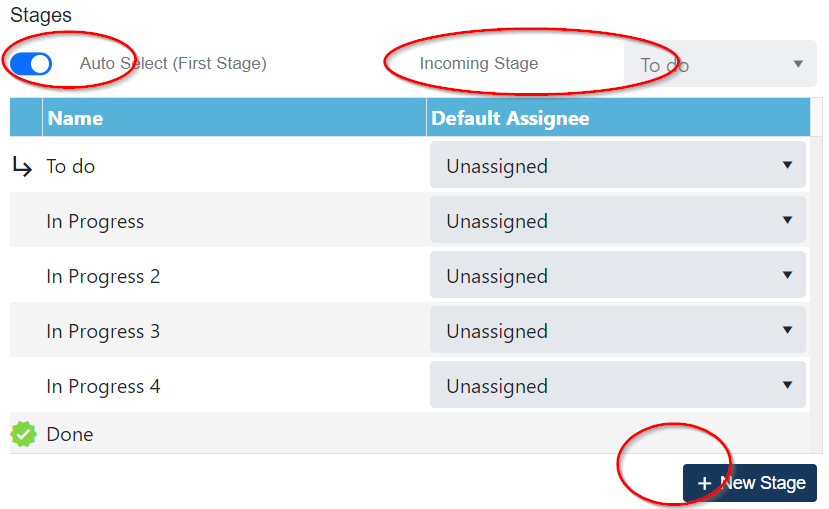 To include more stages and adjust the default assignee for those stages, simply click on the “+ New Stage” button located within the stage panel of the Workflow settings page that will redirect you to the stage panel of the Team settings sidebar, as shown below in the image:
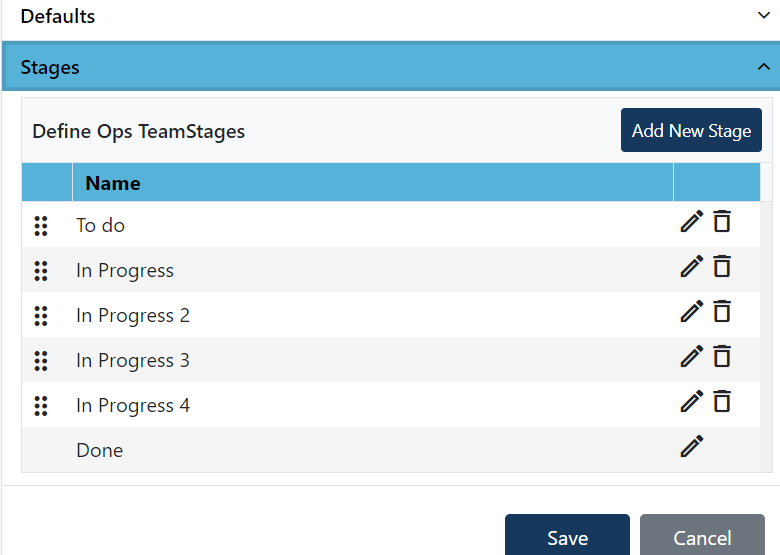
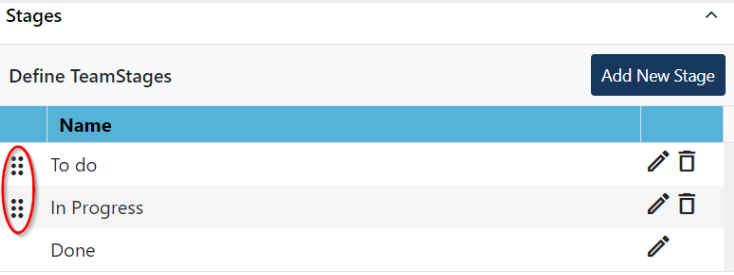
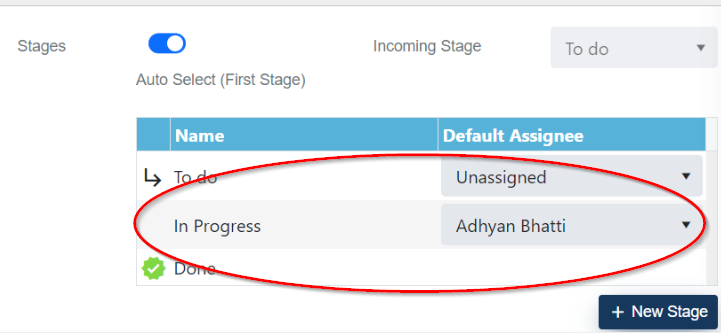
It is important to note that the default assignee for the incoming stage is identical to the default assignee for the Workflow. On the Team setting sidebar page, you can arrange the stages by utilizing the drag and drop down functionality found in the Team settings sidebar. These changes will be immediately seen in the Stage panel of the WF settings page:
Image for sorting from the team settings sidebar:
Changes will be seen here in the stage sorting (Workflow settings page):
Please note that the final stage in the Workflow panel cannot be deleted, but you have the option to edit the stage name. When editing the stage, you are not allowed to use the words “delegated” and “completed” as they are reserved stage names. Furthermore, duplicate stage names are not permitted.
Stage visibility: you have the ability to skip Workflow stages, providing the flexibility to bypass certain stages. This can be done from both the Workflow settings page and the task sidebar, giving users the option to customize their task progression and streamline their workflow according to their specific needs.
The process for stage skipping from the workflow settings page:
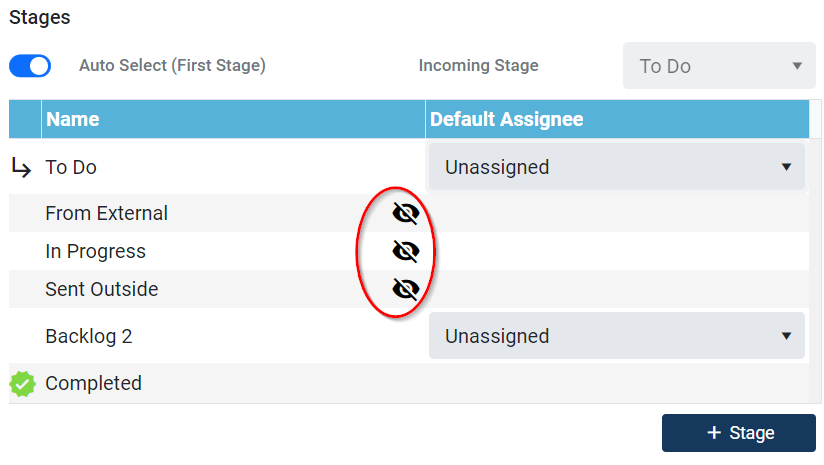
On the Workflow settings page: an eye icon will be displayed for all stages, except the incoming and the last stage, where skipping is not permitted. By clicking the eye icon without a cross symbol, you can click the icon to display a crossed-out state. Once the icon shows a cross on it, it indicates that the corresponding stage has been skipped.
For all the skipped stages, the assignee name will be hidden. However, it’s important to note that this feature does not apply to My Tasks, from the task sidebar or from the workflow settings page.
Hidden assignee name:
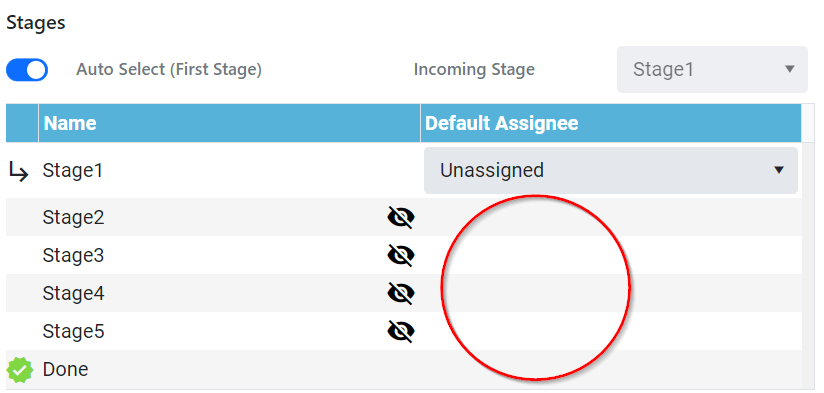
In cases where the auto stage toggle is enabled for incoming stages in a workflow and if the user chooses to skip the first stage, the incoming stage marker will automatically be set to the next visible stage:
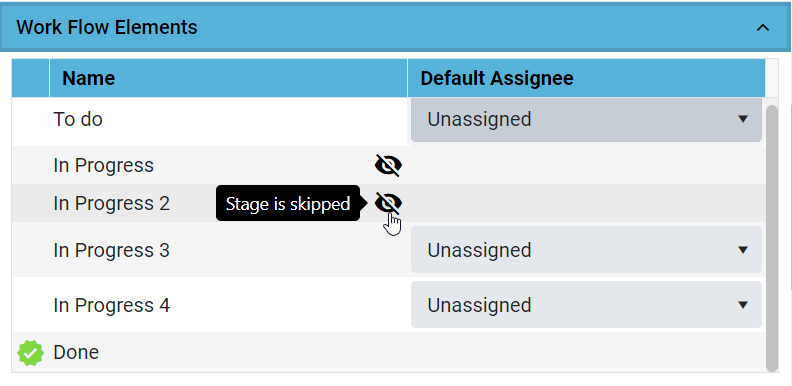
On the Task sidebar: the skipped stages will not be included in the stages dropdown menu within the task sidebar, as well as in the task grid found in Team dashboard. Skipping the current stage where a task is currently located is not allowed. To indicate this, the eye icon will be displayed as disabled, accompanied by a tooltip explaining its unavailability. If a skipped stage becomes visible again, the previously assigned user will be re-displayed.
Stages can be skipped from here in the task sidebar:
Description: On the right-hand side of the Workflow settings page, you will find a description box where you can provide a custom description of your choice. When creating a task using a workflow the task description will be automatically updated to reflect the workflow’s description. By adding a description to the Workflow settings area, users’ comprehension of the task requirements will be improved, resulting in reduced effort and enhanced user efficiency.
Workflow description can be added here:
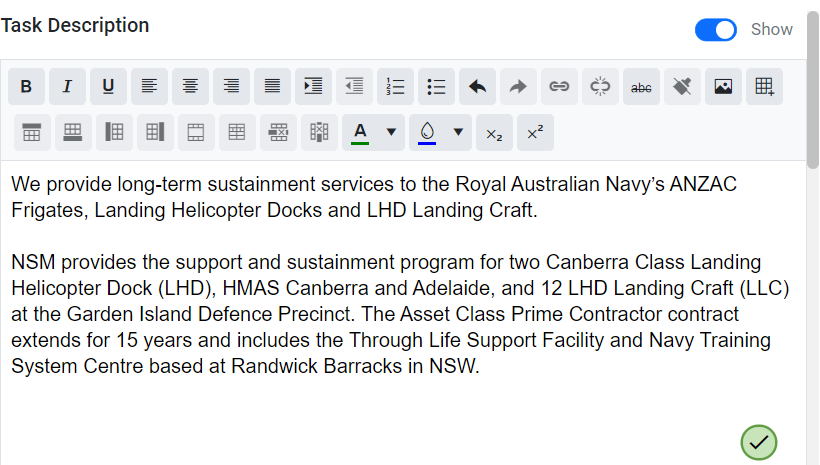
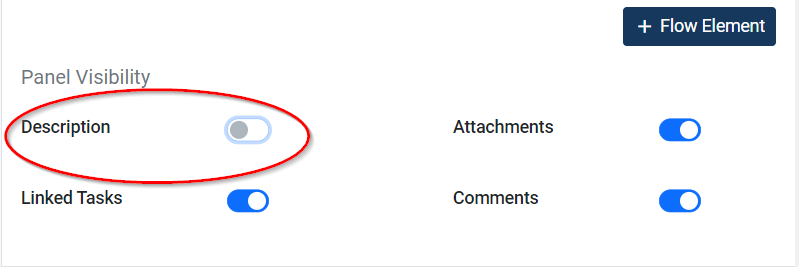
You have the option to hide the description field, giving you the ability to eliminate it from the task sidebar if desired. If you disable the toggle (seen in the above image) in the workflow settings, the description will not be copied from the workflow to the task. Task/Workflow description can also be enabled from the panel visibility of the task sidebar as highlighted below in the image:
Attachment: Attachments added on the Workflow settings page will be included and remain visible during task creation when someone intends to assign a task to your Workflow. A file attachment limit of 0.0019 GB has been set. By toggling the attachment option off, you can hide attachments that are added to Workflows. When the attachment toggle is turned off, the attachment panel will be hidden when a user attempts to create a task for your Workflow. It can be enabled from the task sidebar if needed to be.

Subtasks and Childtasks: Subtasks and child tasks are linked to a parent task, enabling progress tracking, and can have their own due dates and assignees. Additionally, you can choose to close the main task once the subtasks and child tasks are completed by enabling the dependency toggle in the task sidebar.
Subtask grid in the designer page:

Subtasks: A sub-task functions as a checklist or to-do list linked to a particular task, and fulfilling all subtasks usually indicates the completion of the parent task. You can add subtasks either directly from the Workflow settings page or conveniently from the task sidebar. This option allows for efficient task breakdown and organization, enhancing productivity and progress tracking.
Within the Workflow settings page, you can include subtasks that will become part of the task during its creation. When a user creates and assigns a task to your Workflow, these pre-added subtasks will be seen in the task sidebar. If necessary, you can convert a subtask into an independent task by selecting the “Convert to Task” option from the task sidebar as shown in the below screenshot.
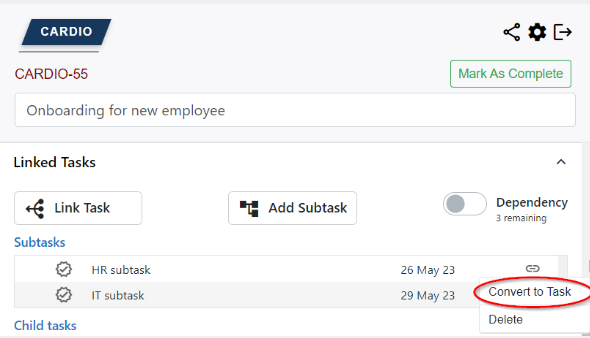
In addition to the option to add a subtask from the task sidebar, you can do so by simply entering the task name and saving it, as indicated in the below highlighted section of the image. Upon clicking “Add Subtask,” a new interface will appear, prompting you to enter the subtask name and save it accordingly. This user-friendly process allows for quick and convenient subtask creation, enhancing task management efficiency.


When converting a subtask into a task, the due date will be determined according to the settings configured on the workflow page. If no modifications are made to the due date in the Workflow settings, a default due date of 3 days will be automatically assigned.
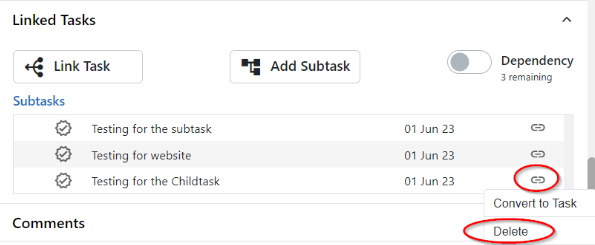
 Additionally, you have the freedom to remove a subtask from the task sidebar by clicking on the designated link located on the right-hand side of the added subtask. This simple and straightforward process allows you to easily delete subtasks as needed, providing flexibility in managing task details:
Childtask:
A child task refers to an individual task that is connected or related to a parent task. It can have its own specific objectives, deadlines, and people responsible for its completion. Child tasks are commonly utilized when there are several concurrent or interconnected tasks that need to be coordinated as part of a larger parent task. By breaking down the overall main Task into smaller, manageable units, child tasks help in organizing and overseeing complex tasks more efficiently.
Within the Workflow setting page, you can add several child tasks, assigning it to the same or another team. You can also choose a user or send the task to Workflow(s) listed under a team. The child tasks that are added on the Workflow settings page will be displayed in the Linked task grid of the Childtasks section:

It is crucial to recognize that the incoming stage of the child task remains according to the settings specified on the Workflow settings page. You have the choice to remove the childtask from the task sidebar if you want to delete it:

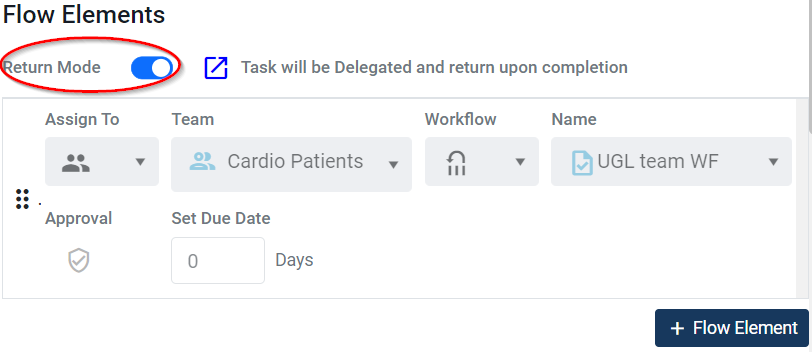
Return Mode: just under the description, there are Workflow return modes that determine the return route of the initial team during the Workflow set up. The return mode gives you the option to either delegate or pass on a task initially. Once the initial selection is made, all subsequent flow elements will be automatically passed on.
Return mode in the designer page:

External Flow Elements:
Now, let’s move on to the next section of the Workflow, which involves external flow elements. This part will add a dynamic element to your workflow. This feature has been integrated to automate the process of task transitioning from one team to another. All team members can add flow elements to the Workflow settings page.
Image for Flow element grid in the designer page:
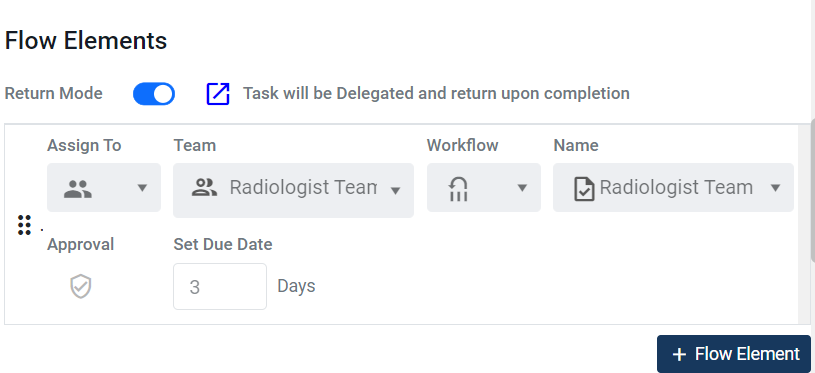
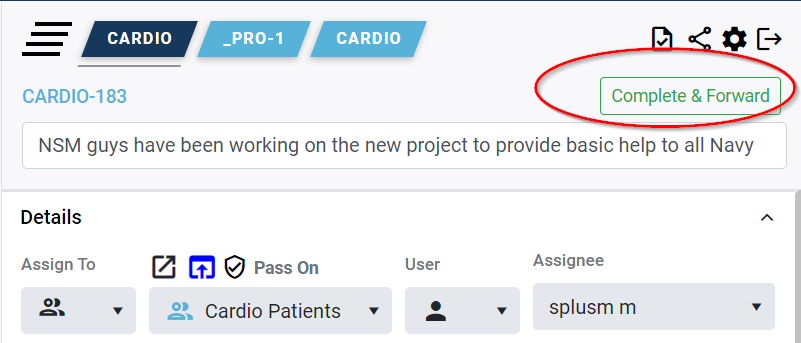
Once the initial task exits the original team/user, it will then be controlled as per the external flow elements that you have set up within the Workflow settings page. The flow elements come into action once you mark the initial task as “Complete and Forward” from the task sidebar, as highlighted in the image below:
You have the flexibility to delegate or pass on the task to the originating Team as per the return mode set up in the Workflow settings page. The task can only be passed on to the subsequent external flow elements:
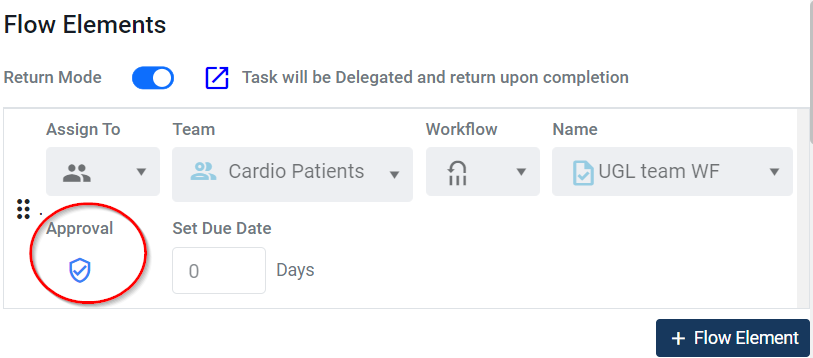
You also have the ability to click on the approval icon within the flow element grid, enabling you to request approval from a designated team or individual user. Approvals initiated from the designer page will automatically appear in the task sidebar’s flow elements grid.
Please note that in addition to the members of the team that initiated the task, members of the team where the task is currently active can also add or delete the flow elements for the task.
After completing the setup of the Workflow, you are now prepared to utilize it for creating tasks. With the addition of the Automation in task management brings a myriad of benefits, revolutionising the way professionals work and collaborate