Optimize Approval Processes
Drutas gives you the ability to create a task that can follow a SOP wherein approval for task or expense claim is required by a team member. This can be specific to a team or organization.
Managing task approvals ensures upfront feedback and communication. It provides approvers with clear-cut requirements for decision making. Approval initiators are kept updated on progress, keeping task requests on track.
Notifications on the update of tasks are sent to the User via the app and email. Plus, a detailed activity log at task and team/project level is maintained to ensure transparency.
Key points on Approvals:
Selecting an option is a two-step process: choose your preferred option from the dropdown menu (Approved, Rejected, Reassign, Recommended, On Hold and Skip Approval), then click the Tick Mark icon (✓) to confirm.
Note: navigating away without clicking the icon will result in the decision not being recorded.
Make sure your decision reflects a thorough review of the request.
If required, you can add notes with your approvals.
- The approval status actions and save button are highlighted below in the image:

Select the appropriate action from the options available in the dropdown
Approved:
To confirm that the request has been received, reviewed, and accepted.
Rejected:
To decline the request if it does not meet the required criteria. Approval request is returned to the sender.
Reassign:
To transfer the approval responsibility to another approver.
Recommended:
To recommend the request before forwarding the request to the next approver in the sequence.
On Hold:
To temporarily pause the approval process until additional review or information is available.
Skip Approval:
To bypass the current approval step and move the request to the next stage in the workflow (cases when approval may no longer be needed or already done elsewhere)
![]()
Task Progression:
Once you have completed your review and taken the appropriate action, the task will automatically move to the next approver in the sequence (if applicable) to finally Mark as Close, shown below:
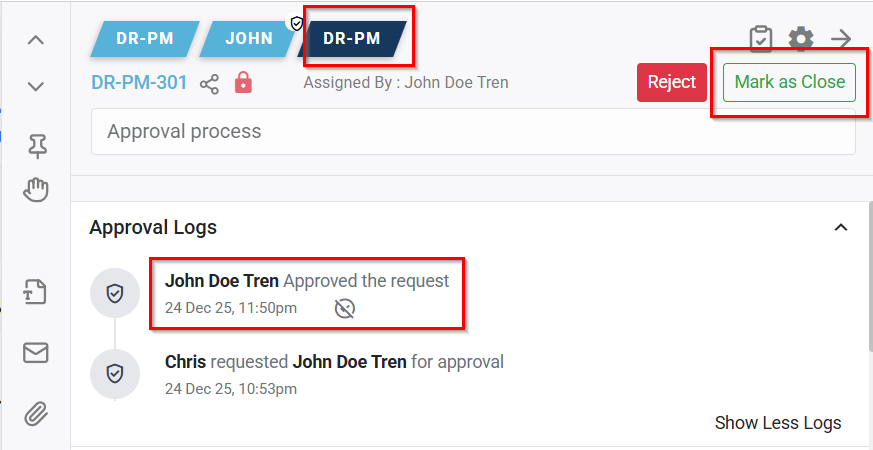
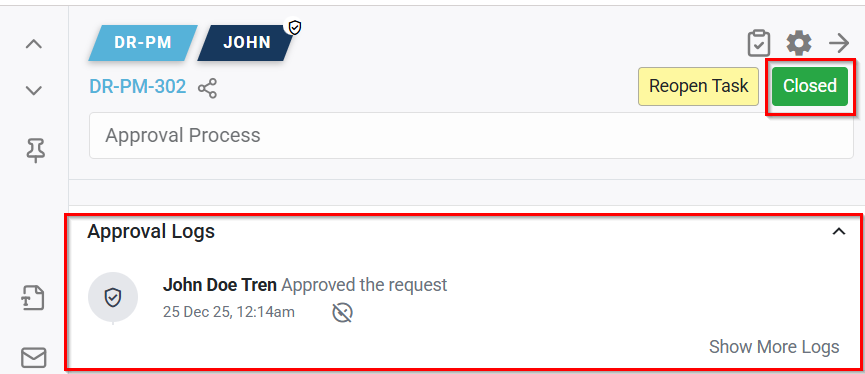
If you are the final approver in the workflow, marking the approval decision will finalize the approval and close the task.
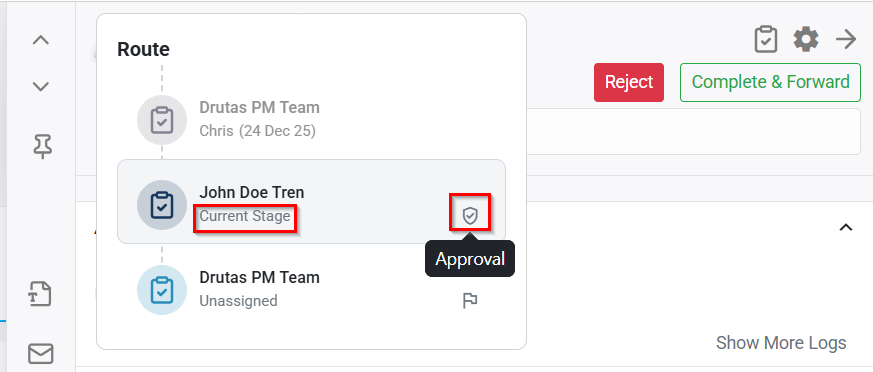
This progression is visible in the task breadcrumbs at the top of the Task as shown below:
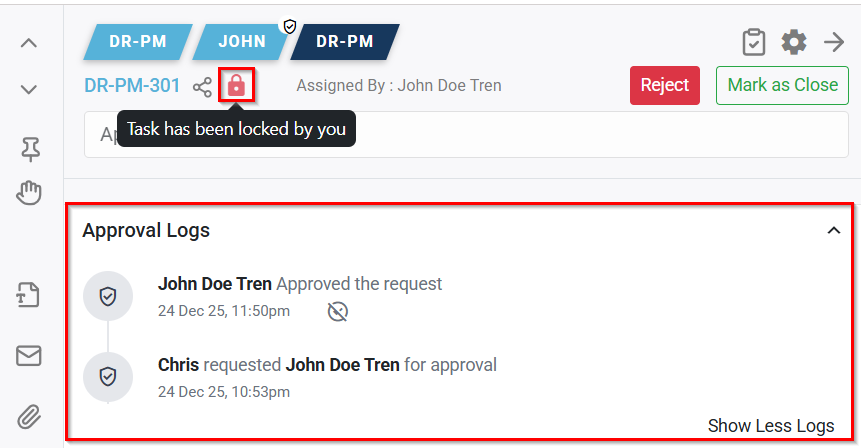
Approval History and Status Icon:
You can view approval history in a grid format, along with an approval status icon that appears in the top right corner of the task sidebar for easy reference, shown below:
![]()