How to access the Workflow Designer page:
- Go to a Team, click the settings gear icon
- Teams sidebar will be opened, switch to the Workflow page
- Click an already existing workflow or click “Add Workflow” button
Settings up the Task creation:
Configure workflow settings (below Workflow Designer & Quick Info) to auto-fill task fields during the task creation.
Task Details:
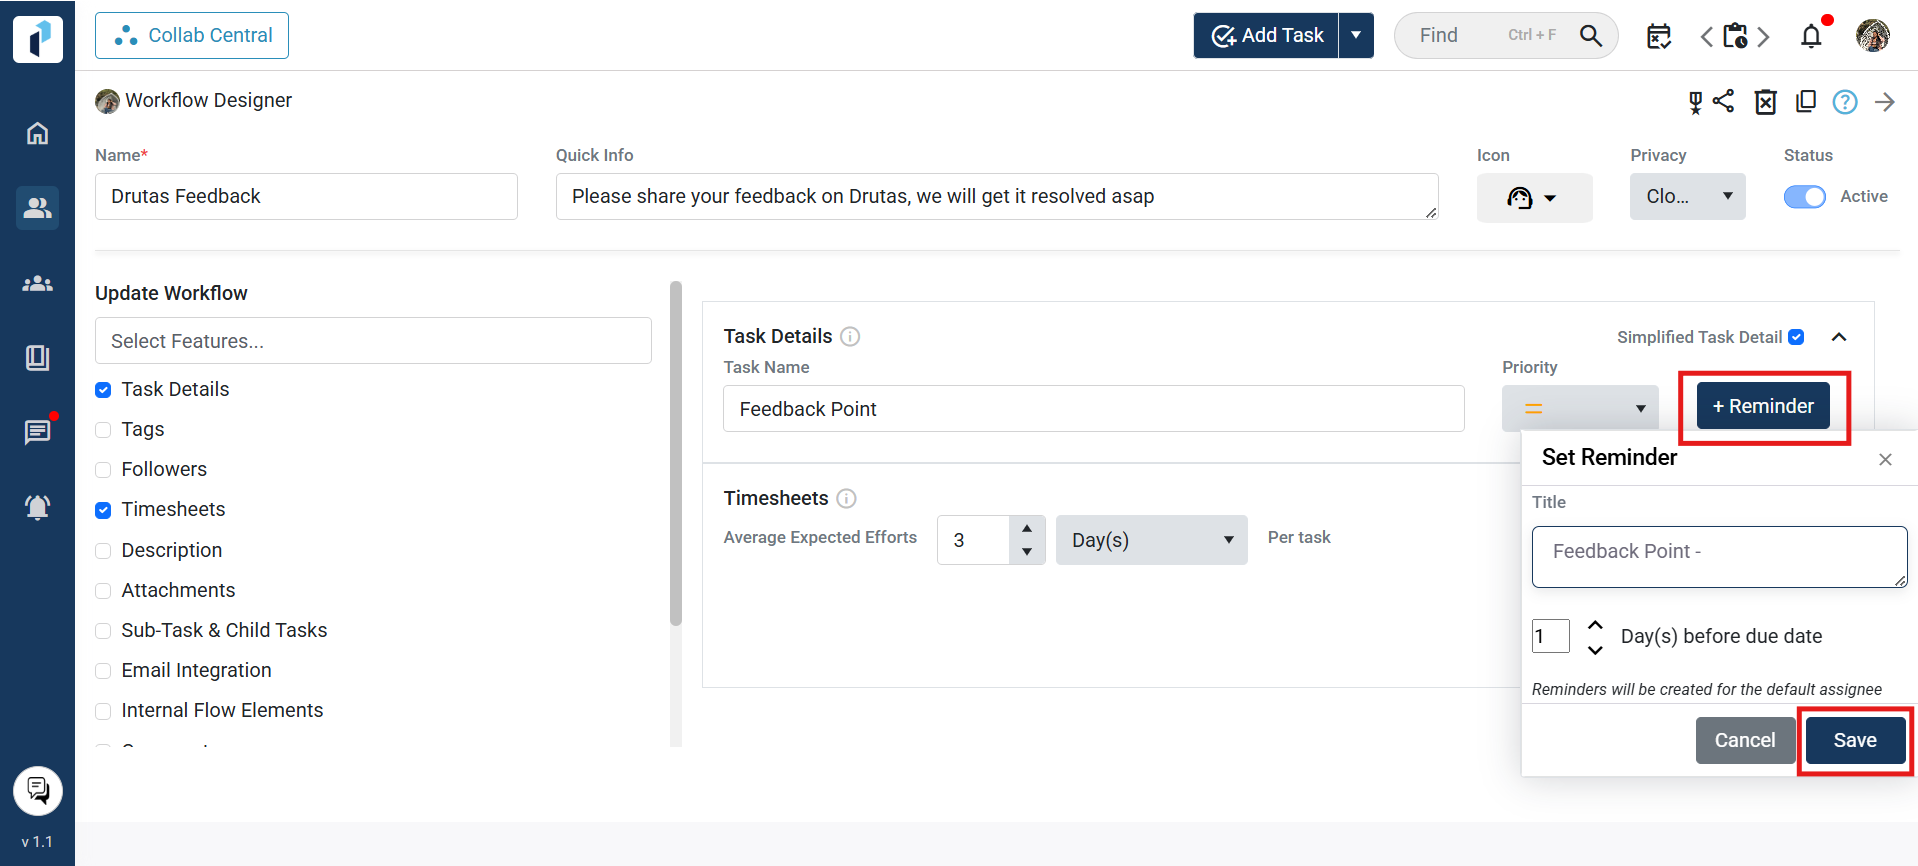
Select ‘Task Details’ from the left menu to set a task name, priority, and reminders. If the task name is left blank, you can enter a name manually during the task creation, but a predefined one will override it. ‘Simplified Task Details’ is enabled by default; deselect for a detailed view. Task details options have been highlighted before:

Reminders:
You can set up dynamic reminders in the task details and get notified when you’re near it. Reminders added will be automatically applied to the task when created using the Workflows,

Task Tags and Followers:
Click the tag label to add or create tags for task filtering in Teams. Add followers from Workflow Settings; they have view-only access. Tags and followers features are highlighted below.

Timesheets:
Enable the Timesheets toggle to set ‘Average Expected Efforts’ in days or weeks, which will be added to the task due date in the workflow. Alternatively, you can manually set the due date using the task sidebar calendar toggle.
Description:
Enter a custom description and click the button in Workflow Settings to auto-populate task descriptions. You can hide it in the task sidebar by disabling the show toggle. Enable ‘Description Pop-out’ to open it in pop-out mode during task creation. Set user permissions to allow editing, smart chips, or read-only mode.

Attachment:
To add attachments, use ‘Add Attachment’ in Workflow settings. File size limit: 0.0019 GB. Toggle off to hide in task creation; show from task sidebar if needed.

Subtasks and Child Tasks:
Child Tasks:
Break down a parent task into smaller tasks with due dates and assignees. Adding a child task enables the dependency toggle in workflow settings, triggering alerts during completion.
Follow the below steps to add a Child tasks
- Click “+ Child Task”.
- Enter details (team/project/user, name, priority, due date).
- Click Save.

- Add a description via the highlighted icon
![]()
Sub Tasks:
Subtasks can be added as checklists or to-do lists within a task. To add a subtask:
- Click the “+ Subtask” button in the workflow settings, enter a name and due date in the window that opens, and click save, as shown below:

- Created tasks will show these subtasks in the task sidebar.
- If needed, convert a subtask into an independent task using the “Convert to Task” option in the task sidebar, as shown below:

- The converted task will be added under the child task lists of the parent task.
Email Integration:
The Email Integration feature lets you create an email ID for receiving Workflow emails. Share it with external users, to enable, go to Team Settings, select Workflow, enable Email Integration, and click the edit email icon to set up an ID (domain cannot be changed).
Click outside or save to check availability. If taken, an “Already Exists” error appears; otherwise, Workflow updates automatically. Use the copy email icon to copy the address.


Internal Flow Elements:
Team owners and collaborators can access Internal Flow Elements (Stage) in Workflow settings. Adding a stage opens the Team settings sidebar.
Some important information on the stages
- Only the team owners can add, delete, edit, or rearrange stages
- You can select the incoming stage, add a new stage, and modify the default assignee for each stage.
- You can also deactivate the auto-select toggle to choose the incoming stage from a dropdown menu of available options, as shown below in the image:

How to add a Stage using the Workflow settings page:

Skipping a Stage:
If you’re a team owner, you have the ability to skip the team stages using the workflow stages, providing the flexibility to bypass certain stages.
Comments:
